Skip to content
 Enhancing Your Basement with Egress Windows
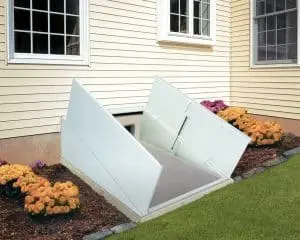
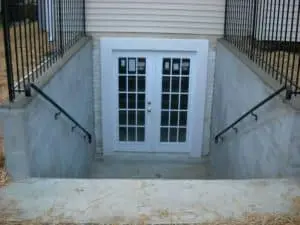
Egress windows are essential for transforming basements into safe and livable spaces. They provide a necessary exit in case of emergencies, ensuring compliance with building codes while enhancing the overall aesthetics of your home.
By installing egress windows, homeowners not only meet safety requirements but also increase natural light and ventilation in their basements. This upgrade can significantly improve the comfort and usability of the space, making it ideal for bedrooms, offices, or recreational areas.
Benefits of Egress Windows for Homeowners
Investing in egress windows yields multiple benefits for homeowners, including increased property value and improved safety. These windows serve as a legal requirement for any basement sleeping area, providing peace of mind for families.
Furthermore, egress windows enhance the livability of the basement by allowing natural light to enter, reducing the need for artificial lighting. This not only creates a more inviting atmosphere but can also lead to energy savings over time.
Understanding Local Building Codes for Egress Windows
Each locality has specific building codes governing the installation of egress windows, which are crucial for ensuring safety and compliance. Familiarizing yourself with these regulations can help you choose the right window size and placement.
Consulting with a professional like Budget Dry Waterproofing ensures that your egress window installation meets all local codes, avoiding potential fines and ensuring the safety of your home. This expertise is particularly important for homeowners looking to convert their basements into livable spaces.
Scheduling Your Free Basement Inspection
To get started with your egress window installation, scheduling a free basement inspection is a crucial first step. This inspection allows our experts to evaluate your space and recommend the best solutions tailored to your needs.
During the inspection, we assess factors such as foundation type and property grading, ensuring that the installation process will be smooth and compliant with all necessary regulations. This proactive approach helps you make informed decisions about your basement renovation.
Enhancing Your Basement with Egress Windows
Egress windows are essential for transforming basements into safe and livable spaces. They provide a necessary exit in case of emergencies, ensuring compliance with building codes while enhancing the overall aesthetics of your home.
By installing egress windows, homeowners not only meet safety requirements but also increase natural light and ventilation in their basements. This upgrade can significantly improve the comfort and usability of the space, making it ideal for bedrooms, offices, or recreational areas.
Benefits of Egress Windows for Homeowners
Investing in egress windows yields multiple benefits for homeowners, including increased property value and improved safety. These windows serve as a legal requirement for any basement sleeping area, providing peace of mind for families.
Furthermore, egress windows enhance the livability of the basement by allowing natural light to enter, reducing the need for artificial lighting. This not only creates a more inviting atmosphere but can also lead to energy savings over time.
Understanding Local Building Codes for Egress Windows
Each locality has specific building codes governing the installation of egress windows, which are crucial for ensuring safety and compliance. Familiarizing yourself with these regulations can help you choose the right window size and placement.
Consulting with a professional like Budget Dry Waterproofing ensures that your egress window installation meets all local codes, avoiding potential fines and ensuring the safety of your home. This expertise is particularly important for homeowners looking to convert their basements into livable spaces.
Scheduling Your Free Basement Inspection
To get started with your egress window installation, scheduling a free basement inspection is a crucial first step. This inspection allows our experts to evaluate your space and recommend the best solutions tailored to your needs.
During the inspection, we assess factors such as foundation type and property grading, ensuring that the installation process will be smooth and compliant with all necessary regulations. This proactive approach helps you make informed decisions about your basement renovation.